
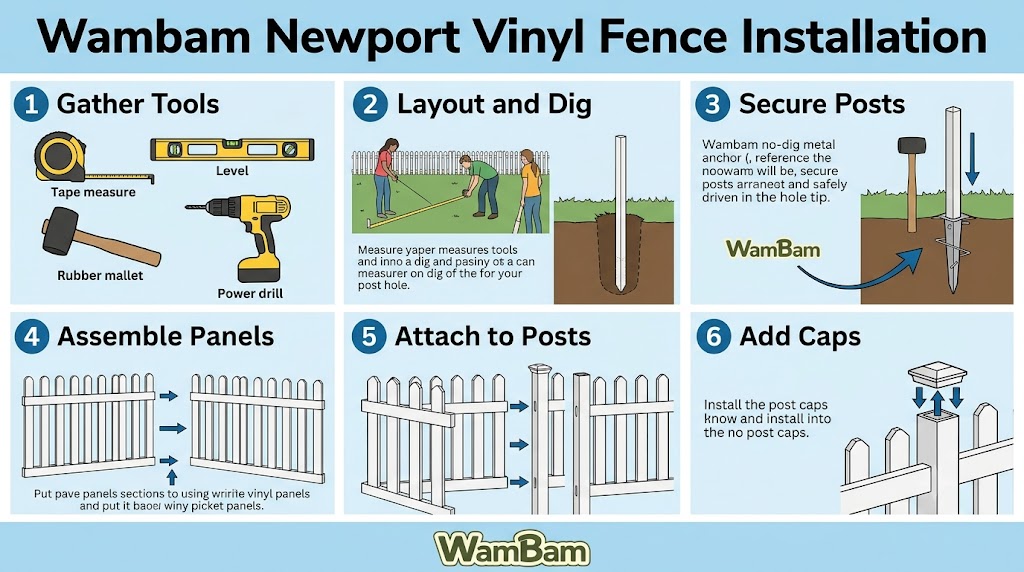
The WamBam Newport vinyl fence installation instructions make this project look simple, but precision matters more than strength. The ZP19002 Newport kit uses steel pipe anchors instead of conventional excavated post holes, so a small alignment error made early can affect every panel that follows.
This guide translates the manufacturer’s manual into a practical installation sequence, adds planning checks that can prevent expensive corrections, and explains the measurements many abbreviated tutorials skip. Follow it alongside the manual supplied with your kit, especially when working near utilities, slopes, gates, corners, rocky soil, or property boundaries.
What Comes With the Newport ZP19002 Fence Kit?
Before following the WamBam Newport vinyl fence installation instructions, confirm that you have the correct product. The Newport ZP19002 is a white vinyl picket panel measuring approximately 36 inches high by 72 inches wide, and each panel box includes one post, one steel pipe anchor, one post cap, rails, brackets, pickets, and installation hardware.
The standard kit contains one top rail, one bottom rail, four rail brackets, eleven pickets, one 44¾-inch pipe anchor, one post, one cap, and twenty-four ¾-inch self-drilling stainless-steel screws. Because each panel kit supplies only one post-and-anchor assembly, a separate Newport finishing post is normally required at the end of a fence run.
Key kit facts:
- Model: ZP19002
- Nominal assembled size: 3 feet high by 6 feet wide
- Pipe-anchor spacing: 72 inches center to center
- Pickets per panel: 11
- Approximate manufacturer assembly time: 60 minutes
- Matching finishing post: ZP19003
- Matching gate: ZP19004 Newport gate kit
These specifications come from the manufacturer’s current online installation guide and product listing. Always compare the parts in your box against the supplied manual before beginning assembly.
Plan the Fence Run Before Driving Any Anchors
The most important part of the WamBam Newport vinyl fence installation instructions happens before a hammer touches steel. Confirm the property line, check local fence requirements, mark gates and endpoints, and call 811 before driving anchors because no-dig installation still penetrates deeply enough to contact buried utilities.
Set a stake at each end of every straight run, then pull a taut mason’s string between them. Measure the complete run in inches and map every 72-inch post center; this reveals whether the final panel must be shortened and whether a finishing post, gate post, or corner changes your material count.
Check the Grade Early
The Newport panel is designed to be stepped, not racked to follow the natural slope. The manufacturer warns that a grade change greater than approximately five to six inches across one six-foot panel may exceed the available post length, so evaluate elevation before ordering or installing the complete fence.
Build One Complete Panel First
Do not install every pipe anchor immediately. The official WamBam Newport vinyl fence installation instructions recommend completing one panel first, learning how the anchor, post, brackets, and rails interact, and then continuing one or two anchors at a time until the process becomes familiar.
Tools Required by the WamBam Newport Vinyl Fence Installation Instructions
A manual post pounder is generally the most controlled tool for this small pipe-anchor system. A 10- to 15-pound sledgehammer can work for a short run, but one person should monitor the level while another drives the anchor; the installation guidance cautions that a light five-pound hammer does not generate enough effective force.
There is a noteworthy conflict in WamBam’s online material. One installation page describes a gas-powered pounder as the fastest option, while the Newport product page specifically states that a gas post pounder is unsuitable for the included pipe anchor. Treat the product-specific warning as controlling unless WamBam confirms that a particular driver and adapter are compatible.
Recommended tools and supplies:
- Tape measure and marking paint
- Stakes and mason’s string
- Two-way level or magnetic torpedo level
- Manual post pounder or 10- to 15-pound sledgehammer
- Cordless drill and driver bits
- ⅛-inch drill bit rated for steel
- Wood block to protect the vinyl posts
- Fine-tooth saw for shortening rails
- Eye protection, gloves, and hearing protection
- PVC glue for permanently securing post caps, when desired
- Additional ¾- to 1¼-inch self-drilling hex-head screws for optional anti-lift fastening
Keep every tool within reach before driving the first anchor. Interrupting the process to locate a level or measuring tape increases the chance that an anchor will move while partially embedded.
WamBam Newport Vinyl Fence Installation Instructions: Step by Step
A successful installation is a sequence of controlled measurements rather than one long burst of hammering. Keep the stringline visible, measure each new anchor from confirmed layout marks, and check plumb in two directions before the pipe penetrates too deeply to correct.
The following WamBam Newport vinyl fence installation instructions preserve the manufacturer’s dimensions while adding practical quality-control checks. Never use an already crooked anchor as the reference for the next one; return to the stringline and planned center marks.
Step 1: Mark the First Two Pipe Centers
Mark the first anchor at the starting-post location and the second exactly 72 inches center to center. The manual also describes the spacing as approximately 70¼ inches from the inside of one plastic collar to the inside of the next, but center-to-center measurement is easier to repeat across a longer run.
Step 2: Drive the First Pipe Anchor
Position the pipe anchor directly along the stringline and begin driving it vertically. Check level in both directions approximately every 12 inches; according to the WamBam Newport vinyl fence installation instructions, the anchor’s trajectory is largely established after about 18 inches, making later correction difficult.
Stop when the bottom of the plastic collar sits just above finished ground level. Do not bury the collar, deform the top of the pipe, or strike nearby vinyl components; if the pipe begins drifting, correct it immediately with controlled blows.
Step 3: Drive and Verify the Second Anchor
Drive the second pipe at the 72-inch center mark using the same two-direction level checks. Before adding the vinyl posts, measure from your layout references, confirm both pipes align with the string, and recheck the center-to-center distance at ground level.
This verification is where the WamBam Newport vinyl fence installation instructions either succeed or fail in practice. A small error may seem harmless on one section, but repeated spacing drift can create rail gaps, forced brackets, leaning posts, or a poorly fitted final panel.
Step 4: Slide the Vinyl Posts Over the Anchors
Orient each vinyl post with its tabs at the top, then slide it over the corresponding pipe anchor. Protect the post with a wood block and tap it approximately two to four inches into the soil so the lower vinyl section grips the ground and resists twisting around the internal pipe.
Plumb each post before continuing. Where tampering or upward movement is a concern, the WamBam Newport vinyl fence installation instructions provide an optional method using self-drilling hex-head screws through the vinyl and into the pipe anchor.
For the optional fastening method:
- Drive a ¾- to 1¼-inch self-drilling hex-head screw through the lower post until it contacts the pipe.
- Back the screw out and remove loose vinyl burrs.
- Drive the screw firmly into the internal steel anchor.
- Plumb the post.
- Add a second screw near the upper section using the same process.
Step 5: Install the First Bottom-Rail Bracket
Position the first bottom-rail bracket approximately two inches above ground level and attach it using four supplied ¾-inch stainless-steel screws. Keep the bracket centered and square to the fence direction because its angle determines whether the rail rests naturally or twists under pressure.
For a 90-degree bracket installation, mark the four holes and pre-drill through the vinyl and internal steel using a ⅛-inch drill bit rated for metal. Pre-drilling helps the self-drilling screws track accurately instead of wandering across the smooth post surface.
Step 6: Level the Bottom Rail and Opposing Bracket
Slide a loose bracket onto the far end of the bottom rail, seat the near end into the installed bracket, and place a level on top of the rail. Mark the correct bracket height on the second post, remove the rail temporarily, and secure the second bracket with four screws.
Do not simply measure two inches from the ground at both posts because uneven soil can make the rail slope. The WamBam Newport vinyl fence installation instructions use the rail itself as the leveling reference, producing a cleaner stepped installation and more consistent picket engagement.
Step 7: Secure the Bottom Rail
Insert the bottom rail into both brackets, verify that it remains level, and fasten it to the brackets. Check that the rail’s picket openings face upward and that both ends are fully seated before tightening the screws.
Avoid overdriving screws into the vinyl components. Tighten until the bracket is stable and the screw head is properly seated, but stop before crushing the bracket, stripping the hole, or visibly deforming the post wall.
Step 8: Position the Top-Rail Brackets
Measure 18½ inches upward from the top of the bottom-rail bracket and mark the top-bracket position on each post. Align the upper and lower brackets vertically so the picket holes in the two rails remain directly above one another.
Attach both top brackets using the supplied stainless-steel screws. Recheck the measurement on each post rather than assuming the second mark matches, especially on a stepped panel where the amount of exposed post may differ.
Step 9: Install the Top Rail and Pickets
Slide the top rail into its brackets with the picket holes correctly oriented, then secure the rail. Feed all eleven pickets through the top rail and push each one down until it locks into the bottom rail.
The WamBam Newport vinyl fence installation instructions depend on the top and bottom rails remaining parallel. A picket that stays noticeably high usually indicates rail misalignment, debris, incorrect rail orientation, or incomplete seating rather than a picket that requires heavier force.
Step 10: Fit the Post Caps and Continue the Run
Press each cap onto its post until it locks. PVC adhesive may be used for a permanent bond, although dry-fitting the caps until the complete fence has been inspected makes later post trimming or adjustment easier.
Stand back and inspect the completed first panel from both ends. Confirm the fence line, post plumb, rail level, picket spacing, and ground clearance before repeating the WamBam Newport vinyl fence installation instructions for the remaining sections.
WamBam Newport Vinyl Fence Installation Instructions for Slopes, Corners, and Short Panels
For sloping ground, install Newport panels in a stair-step pattern. Keep each panel level, change its elevation at the next post, and trim excess post height only after approving the full visual line; do not attempt to rack this model because WamBam lists Newport as a stepped-only design.
A standard 90-degree corner can use brackets attached to adjacent post faces, with ⅛-inch pre-drilling recommended where the screws must pass into the internal pipe. For angles other than 90 degrees, WamBam publishes a separate hinged-bracket technique rather than recommending that installers twist the standard brackets.
Shortening the Final Panel
The vinyl rails may be shortened horizontally using a fine-tooth circular-saw blade or hacksaw. Plan the cut so the remaining picket spacing looks intentional, protect the vinyl from scratches, remove cutting burrs, and dry-fit both rails before attaching the final brackets.
Creating a Non-90-Degree Turn
WamBam’s published technique for unusual angles uses galvanized 3½-inch butt hinges, vinyl brackets, and protective white metal paint. The hinge is fastened behind the bracket and then attached to the post, allowing the rail connection to pivot toward the required fence angle.
WamBam Newport Vinyl Fence Installation Instructions: Common Mistakes That Cause Crooked Panels
Most unsuccessful installations do not result from weak materials. They come from skipping the initial layout, measuring between inconsistent points, allowing the first pipe to lean, or installing several anchors before proving the spacing with one fully assembled panel.
Use this WamBam Newport vinyl fence installation instructions checklist before proceeding to the next section:
- Measuring 72 inches edge to edge instead of center to center
- Driving an anchor fully before checking level in both directions
- Using a five-pound hammer that encourages repeated uncontrolled blows
- Following a crooked anchor instead of the stringline
- Measuring both lower brackets from uneven ground
- Installing the bottom or top rail backward
- Overdriving screws and deforming the vinyl
- Forgetting the finishing post at the end of a run
- Trying to rack a Newport panel on a slope
- Installing all pipe anchors before completing a test panel
- Cutting rails or posts before dry-fitting the section
- Positioning a gate after installing the surrounding panels
Check the fence from a distance after every completed panel. A post can appear straight when viewed closely but reveal a visible wave when examined along the complete run.
WamBam Newport Vinyl Fence Installation Instructions for Hard Soil, Rock, and Minor Misalignment
If the anchor stops suddenly, do not increase force blindly. Confirm that the location is clear of marked utilities, inspect for shallow rock or construction debris, and contact WamBam before substituting another anchor method; Newport documentation for the companion finishing post notes that unstable or rocky conditions may require concreting the pipe in place.
A slightly misaligned pipe may still be manageable while only a short section has entered the soil. Once it is deep, the manufacturer warns that removal and repositioning become difficult, so pulling, bending, or hammering sideways can damage the anchor or enlarge the surrounding soil cavity.
What to Do When an Anchor Begins Leaning
Stop driving immediately and identify the direction of movement. Apply controlled force while the anchor is still shallow, then recheck both planes with a level; after approximately 18 inches of penetration, the manufacturer indicates that the trajectory becomes difficult to change manually.
What to Do When the Soil Is Loose
Loose or disturbed soil may not hold a driven anchor as securely as compact, undisturbed ground. Do not assume that deeper uncontrolled driving will solve the problem; contact WamBam for project-specific guidance regarding stabilization or concrete before modifying the standard WamBam Newport vinyl fence installation instructions.
WamBam Newport Vinyl Fence Installation Instructions for Gates and Finishing Posts
A Newport panel box does not automatically finish both ends of a project. Each standard panel advances the fence with one included post, while a separate ZP19003 finishing post is needed at the terminal end; WamBam’s buying guide states that gate layouts may require two finishing posts depending on the configuration.
Install gate posts before the surrounding fence because gate dimensions and hardware tolerances are less forgiving than a cuttable panel. The matching ZP19004 gate is designed specifically for the Newport system, so establish the opening, verify swing clearance and grade, and then build the adjoining panels toward it.
Plan Gate Swing and Ground Clearance
Determine whether the gate will swing inward or outward before driving either supporting anchor. Check for walkways, landscaping, steps, vehicles, and rising ground that might block the gate before it reaches its intended opening angle.
Do Not Hang the Gate From an Unsupported Terminal Post
A gate creates repeated leverage at the hinge post. Use the correct Newport-compatible post arrangement and follow the dedicated gate instructions instead of assuming that any visually similar vinyl post can support the hinges and latch.
WamBam Newport Vinyl Fence Installation Instructions: Final Inspection and Maintenance
After installation, walk along both sides and inspect every bracket screw, rail connection, picket lock, post cap, and post alignment. Remove metal filings left by pre-drilling, clean soil from the vinyl, and keep powered string trimmers from repeatedly striking posts or lower rails.
The Newport product page describes the material as UV-resistant and requiring little maintenance, with a ten-year warranty. Keep the purchase receipt, model number, photographs, and installation documentation because they can simplify replacement-parts or warranty discussions.
Seasonal Inspection Checklist
Inspect the fence after severe weather, ground movement, landscaping work, or nearby excavation. Look for leaning posts, loose bracket screws, displaced post caps, rails pulling away from brackets, and soil erosion around anchor locations.
Cleaning the Vinyl
Use water, mild soap, and a soft cloth or non-abrasive brush for ordinary dirt. Avoid abrasive pads or aggressive tools that could leave visible marks on the smooth white surface.
WamBam Newport Vinyl Fence Installation Instructions FAQs
The following WamBam Newport vinyl fence installation instructions FAQs address the measurements, tool choices, and site conditions most likely to cause confusion during a DIY project.
Use these answers as a quick reference, but retain the manual that came with your kit. Product components and manufacturer guidance can change, so the documentation supplied for your exact model should remain the controlling reference.
What is the exact post spacing for the Newport vinyl fence?
The correct spacing is 72 inches center to center between pipe anchors. The manufacturer also provides an inside-to-inside plastic-collar measurement of approximately 70¼ inches, but center-to-center marking is generally easier to repeat across a multi-panel fence.
Can I install the Newport fence on a slope?
Yes, but the panels must be stair-stepped rather than racked. The WamBam Newport vinyl fence installation instructions warn that a rise or fall greater than approximately five to six inches across one panel may exceed the usable post length, so measure the grade before purchasing all materials.
Can I use a gas-powered post pounder?
WamBam’s online pages conflict on this point. Its online installation guide presents a powered pounder as an efficient option, but the current Newport product page specifically states that a gas post pounder is unsuitable for the included anchor; use a manual pounder or heavy sledge unless the manufacturer confirms compatibility.
Do I need concrete for the Newport no-dig fence?
Normal installation is designed to drive the steel anchor directly into suitable soil without excavating a conventional concrete footing. In rocky or unstable ground, WamBam’s Newport finishing-post documentation mentions concreting the pipe in place, so obtain model-specific guidance before changing the standard method.
How many finishing posts do I need?
You normally need one ZP19003 finishing post at each open terminal end that is not already completed by another compatible post arrangement. Gate projects require additional planning because the gate needs supporting posts, and WamBam indicates that some gate layouts require two finishing posts.
Conclusion: Applying the WamBam Newport Vinyl Fence Installation Instructions
The best WamBam Newport vinyl fence installation instructions can be reduced to one principle: make every irreversible decision slowly. Establish a straight stringline, mark exact 72-inch centers, keep each pipe plumb from the first blows, complete one full test panel, and only then repeat the process.
Before starting, inventory every ZP19002 box, order the necessary ZP19003 finishing posts, establish gates and corners, call 811, and review the current manufacturer manual. Those steps take less time than correcting one misplaced anchor—and they are what turn a quick no-dig project into a straight, durable, professional-looking fence.